
|
|||||
|---|---|---|---|---|---|

|
|||||
FOR BABY:
|
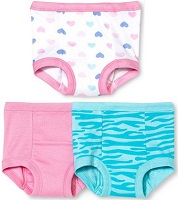
Gerber Training Pants |
Frugal Bedwetter/Training Pants:
Have you got a bedwetter, but not enough money to afford those expensive cloth Bedwetter Pants, or the on-going expense of the disposable ones? You can make your own!You will need: Two padded training pants (you can also use underpants, but padded training pants will be more absorbent), one or two flat or prefolded diapers, four diaper pins and a waterproof outer cover.
Using the cloth diaper, fold it into a long thick rectangular pad. Lay this inside one of the training pants, so that the folded diaper pad lays down the centre of the training pant.
Use two diaper pins to fasten the folded diaper pad in place. Place one pin through the short end of the diaper pad and training pant at the front waist. Place another pin through the opposite short end of the diaper pad and back waist. Pin from the outside of the training pant, so as not to cause discomfort to your child.
Next add the second training pant on the inside of the first, so that you now have a training pant / folded diaper pad / training pant sandwich.
Add a nylon, vinyl or other waterproof pull-on pant over top of everything. Or check into some of the newer fleece pull-on pants! These work great for kids embarrassed by the baby-like
nylon or vinyl pants. Your bedwetter sandwich now has four layers - training pant / folded diaper pad / training pant / waterproof cover.
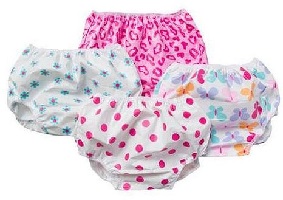
Gerber Waterproof PEVA Pant |
Use the two remaining diaper pins to pin through the three layers - two training pants and one waterproof outer cover - this time placing one diaper pin at each side waist. Push the pins through the same area as the stitching on the waterproof cover to prevent damage.
These pins help to hold everything all together, and will allow your child the independence to quickly pull up and down their Bedwetter Pants when they need to go to the toilet.
If your child needs even more absorbency, you can add another layer of folded diaper, but this could be very bulky.
These Bedwetter Pants can also be used during the day, for older children not quite ready, or not completely potty-trained.
FOR MOM:
Soothing Breast Pads for Nursing Moms:
Aching breasts? Need some relief? Cut out four 6 inch circles of a soft 100% cotton (prewashed) fabric, such as cotton knit, flannelette or double layers of gauze. You can use recycled T-shirts, worn-out cloth diapers, etc. Cut with pinking shears, if you have them, for a nice edge.
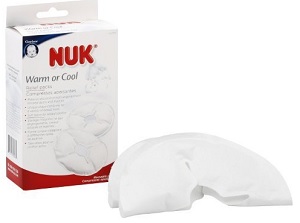
Breast Therapy Warm or Cool Relief Reusable Packs |
|
Put two layers of fabric on top of each other, right sides out. Sew about 1/4 - 1/2 inch from the edge, with a zig-sag or serger, a double row of straight stitch, or even hand-stitching - 3/4 of the way around each circle.
Now fill with rice or whole oats, just enough without being bulky. The pad should still be able to lay flat. Next add just a bit of your favourite spice or scent, or even dried flower petals - not too much.
Close up remaining 1/4 of circle. Repeat, using the second two layers. Now make a second set of breast pads, because you are going to love these!
To use these pads: Simply heat or chill, then slip inside your bra.
Store a set of breast pads in the freezer for cool comfort - especially helpful for use shortly before a feeding to slightly numb sore nipples - it will relieve that initial latching-on pain. Or wear them to bring out flat and inverted nipples - which makes it easier for baby to get a good latch.
Or warm up a set of breast pads in the microwave - start with 20 seconds and check to see if they are warm enough. (Don't make them too hot, or you can burn your delicate breast tissue.) These are very comforting when used on sore nipples after a feeding, or to place over a plugged duct.
This article compliments of Born to Love.
Send questions, comments, and suggestions to: catherine@borntolove.com
Born to Love articles are written by Catherine McDiarmid-Watt
Born to Love is a participant in the Amazon Services LLC Associates Program, an affiliate advertising program designed to provide a means for sites to earn advertising fees.
NOTE: All logos, company names, brands, images, trademarks and other intellectual property are the property of their respective owners.
Born to Love is a participant in the eBay Partner Network, an affiliate advertising program designed to provide a means for sites to earn advertising fees by advertising and linking to eBay.com.
Copyright © 1978 - BorntoLove.com - All Rights Reserved.
Last updated - April 5, 2024