
|
|||||
|---|---|---|---|---|---|

|
|||||

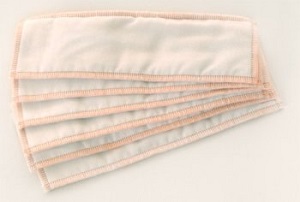
All Together Cloth Diaper Doublers |
Too many receiving blankets? Make a couple dozen of them into great prefold diapers. Even with a high-needs baby, I was able to make at least one of these diapers per day.
Here's how: Cut one receiving blanket down to about 20" x 36" to 40". This should give you a second strip about 7"-10" wide. Fold this narrow strip in half or thirds to about 20" long. Place this down the centre of the large piece, as shown: [ [] ] Fold in the sides of the larger piece about 2/3 of the way across. Overlap them on top of the folded strip down the centre, leaving the diaper about 15" across:
[< [] >] = [[]]
Sewing: Zigzag stitch across the top and bottom raw edges of the folded diaper, making sure to catch in all layers. Stitch down the centre pad about 1/2" in from the edge of the centre pad. (All measurements depend on original size of the blanket. Don't be afraid to experiment!)
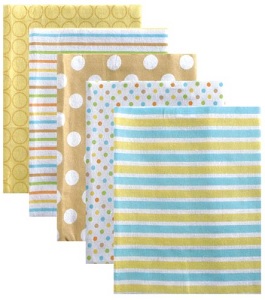
Luvable Friends Flannel Receiving Blankets |
Do you have any old, shrunk and matted wool sweaters? Then you can make two excellent diaper covers per sweater. The more matted the sweater - the more waterproof the covers!
To Make: Cut an equal-sized triangle out of the sweater, using the sweater waist-band as your diaper cover's waist band. Zigzag stitch along raw edges to prevent unravelling. Fold the points in to meet in the centre (diaper-style) and stitch half-way down sides, to form leg holes. Crochet a woollen chain out of some of the remaining wool, about double the width of the waist-band,and thread this through the waist-band.
To use: Multi-layered or double diapers work best with these covers. Pull-on over diaper and tie in front.

Dritz Non-Roll Elastic |
INEXPENSIVE FORM-FITTED DIAPERS:
If you find your prefolds or shaped diapers are leaking, but don't want to invest in more expensive form-fitted diapers, try this!
Get some elastic - bathing suit elastic will last the longest, available at most fabric stores. Cut two strips about 9" long per diaper (1" less for small diapers, 1"-2" more for large diapers). Centre one piece of elastic on each side of your shaped diaper along the leg (or along each side of the centre panel on your prefold). Stretch out the elastic, and zigzag-stitch into place. Now you have form-fitted diapers to help hold back the tide
!
When using these diapers, place the elastic side of diaper away from your baby's skin.
Wish you could afford pinless diapers, but all you can afford is prefolds? Add some Velcro® to your diapers, for a great pinless fit! If your baby is already born, just fold your diapers to fit your baby, try one on for Velcro® placement. Pin a 4"-6" strip of loop Velcro® across the front of the diaper, and 1"-2" strip of hook Velcro® on the top-inside of the diaper, coming round from baby's back, one strip on each side of waist. Make sure this will hold the diaper on your baby snugly and securely, remove diaper from baby, and then sew the Velcro® in place. Use this diaper as a sample to mark the rest of your diapers.
If your baby isn't born yet, fold your diapers down about 1/3 and place your loop Velcro® across there. When baby outgrows this, you can simply unstitch and move the Velcro® about 1"-2" above or, for longer use, add another strip of loop Velcro® that is 2"-4" longer above the first strip.
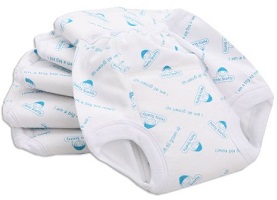
Potty Scotty Training Pants |
Place a pair of thick thermal training pants, that fit snugly, over your baby's cloth diapers - instead of a diaper cover. With a good absorbent diaper, maybe with the addition of a diaper doubler or two, this will let your baby's skin breathe - yet help to keep the wetness inside.
Plus, you can use these pants again when your baby is ready for potty learning.
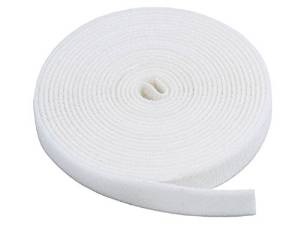
Hook and Loop Fastening Tape |
Sizing: small - cut 12" (31cm) long; medium - cut 18" (46cm) long; large - cut 24" (61cm) long; xlarge - cut 30" (76cm) long.
Trim off all the corners, into curves. Place the Velcro® pieces back to back (with the hook and loop sides facing out, away from each other.) Sew together, around all four edges.
That's it! One fastener is all you need! If you wish, you could make one or two more, in case one gets soiled or lost.
Care: Wash by hand in the sink and hang to dry for longer wear.
To Use: Simply place the diaper on your baby as you normally would. But, instead of using pins or clips, wrap this Velcro® diaper fastener around the diaper at your baby's waist, with the hook side facing the diaper, overlapping the Velcro® at baby's front (or back, if your baby can undo the strap!) to fasten.
The Velcro® hook part helps to hold the diaper in place. Make sure that the hooks are completely covered by the diaper or they may irritate your baby's skin.

Rip Stop Nylon By The Yard |
All out of diapers and baby needs to be changed, NOW!? Use a cotton T-shirt! Any size will do, but the bigger the shirt, the more the absorbency. Place the T-shirt on a flat surface. Fold in sides to form a tapered end (cross over each side in the middle) at the T-shirt hem. Place baby's bottom on the centre of the T-shirt and wrap the sleeves around baby's tummy. Bring tapered end up, fold over overlapped sleeves and tuck in. Pin securely. Need a diaper cover in a hurry, and they're all in the wash!? Use a plastic bag! Cut a T-shape out of a grocery bag for a baby under about 16 lbs., or a garbage bag for a bigger baby. Cut the bottom part of your
Tabout 10" (25cm) wide on the bottom fold of the plastic bag. This is the crotch part of your emergency
diaper cover.
Cut the top part of your T
across the width of the plastic bag. This will be the waist ties. Make your T
about 8" (20cm) high for small, 10" (23cm) high for medium or 13" (33cm) for large. Cut the sides of your T
curved, for better coverage. Cut open the waist ties, so you can tie it on over baby's diaper. Ties can be about 20" (51cm) long for small, 23" (58cm) for medium or 27" (69cm) for large. Trust me, it sounds more complicated than it is . . .
When you open up the cover, you should have a giant H
shape. Place a folded prefold diaper inside, place baby on top, and tie at each side of baby's waist.
If you really like this style of diaper cover, you can cut some more out of waterproof, rip-stop nylon for no-sew, indestructible, washable tie-on diaper covers.
This article compliments of Born to Love.
Send questions, comments, and suggestions to: catherine@borntolove.com
Born to Love articles are written by Catherine McDiarmid-Watt
Born to Love is a participant in the Amazon Services LLC Associates Program, an affiliate advertising program designed to provide a means for sites to earn advertising fees.
NOTE: All logos, company names, brands, images, trademarks and other intellectual property are the property of their respective owners.
Born to Love is a participant in the eBay Partner Network, an affiliate advertising program designed to provide a means for sites to earn advertising fees by advertising and linking to eBay.com.
Copyright © 1978 - BorntoLove.com - All Rights Reserved.
Last updated - April 5, 2024